How to Prevent Pipes From Freezing: 7 Fixes Before Winter
If this fix touches water, gas, or power, the guide starts with the shutoff step and says when a licensed pro should take over.
Product links in this guide are affiliate links. If you buy through one, we may earn a small commission at no extra cost to you. It never changes which products we recommend.
A burst pipe is the most expensive plumbing problem a house can have in winter, and it is almost always preventable. The pipes that freeze are rarely random. They’re the ones along cold exterior walls, in the garage, in the crawl space, and under the sink on the north side. A weekend and about $50 in foam and caulk is the entire fix.
Quick Answer
Here’s how to prevent pipes from freezing: insulate every exposed water pipe in unheated spaces with foam sleeves, seal the air leaks where pipes enter the house, open the cabinet doors under sinks on exterior walls during cold nights, and let those faucets drip at a thin stream when the forecast drops into the teens. Disconnect the garden hoses and keep the thermostat at 55°F or higher, even when you’re away. It’s 1 to 3 hours of work and $15 to $80 in materials. For a pipe that freezes every winter despite all of this, an electric heat tape with a built-in thermostat is the next step. If the pipe runs through an uninsulated outside wall, a plumber can re-route it.
What You’ll Need
- Foam pipe insulation sleeves, $5–$15 per 6-foot section
- A thermostat-controlled heat cable, $25–$60, for the one stubborn spot
- A can of low-expansion spray foam, $6–$9, and a tube of caulk
- Duct tape or pipe insulation tape
- A flashlight and a tape measure
- A hygrometer-thermometer is optional, $10, to monitor a crawl space
Step-by-Step
Find the pipes at risk
Walk the house with a flashlight. Check the garage, the basement along the outside walls, the crawl space, the attic, and every cabinet on an exterior wall. Any water pipe in an unheated space is at risk, and so is one in a heated space that runs through an uninsulated wall. Mark what you find on a sketch. Also locate your main water shutoff and make sure everyone in the house knows where it is.
Insulate the exposed pipes
Slide self-sealing foam sleeves over every accessible pipe, cut to length with a utility knife, and tape the seams. Cover the elbows and valves too, since they lose heat fastest. Foam sleeves slow heat loss, they do not generate warmth, so they work best on pipes that sit in air a little above freezing. They are inexpensive and take about 5 minutes per 6-foot run. Pipe insulation for a pipe in a crawl space matters more than for one in a conditioned basement.
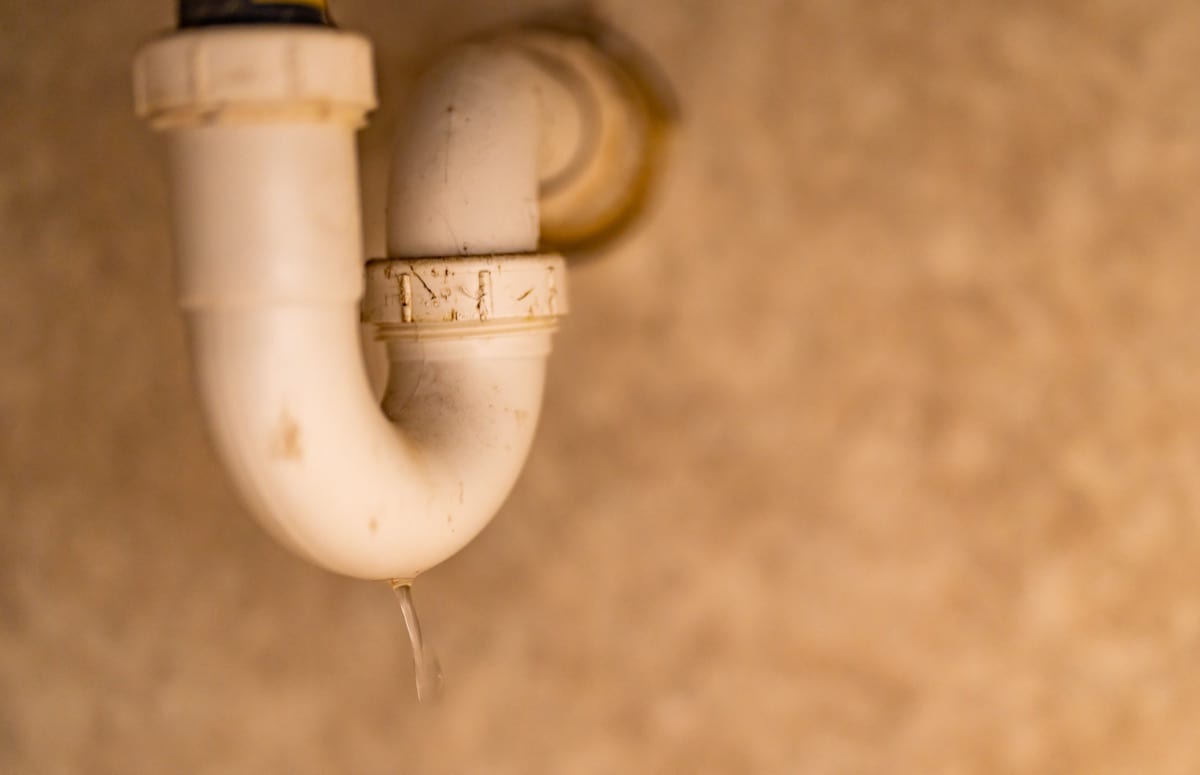 Pipes under a sink sit behind a closed door, cut off from room heat. On exterior walls that’s where freezes start. Photo by Tony Webster via Wikimedia Commons, CC BY 2.0, resized.
Seal the air leaks around pipes
Look for gaps where pipes go through walls, floors, and the rim joist. Fill small gaps with caulk and larger ones with low-expansion spray foam, the kind labeled for windows and doors. A one-inch hole around a pipe can pull enough cold air to freeze it on a windy night. This is the same job as sealing drafty windows, and it cuts your heating bill too.
Keep warm air reaching the pipes
On nights below about 20°F, open the cabinet doors under sinks on exterior walls so room air can get in. Move chemicals out of reach if you have kids or pets. Set a small drip on the faucet fed by the coldest pipe, hot and cold both if it has two handles: a thin stream, no wider than a pencil lead. Open the damper or vent on a crawl space only if your local advice says to, as some builders seal them for winter.
Add heat tape for the problem spot
For a pipe that has frozen before and can’t be moved, wrap a UL-listed heat cable along it, following the instructions exactly. Choose one with a built-in thermostat so it only draws power below about 38°F. Never overlap the cable on itself, and never use a cable that isn’t rated for the pipe material. Plug it into a GFCI outlet. Replace any cable that’s more than a few seasons old and shows cracking.
Time and Cost
| Fix | Time | Cost |
|---|---|---|
| Foam sleeves on accessible pipes | 30–60 min | $15–$40 |
| Seal air leaks with caulk and foam | 30–60 min | $10–$20 |
| Thermostatic heat cable on one pipe | 30 min | $25–$60 |
| Plumber re-routes a pipe out of an exterior wall | — | $500–$1,500 |
Why This Works
A pipe freezes when it loses heat faster than the surrounding air and the water inside can supply it. Still water in a small pipe loses heat quickly, and once it reaches 32°F and starts to turn to ice, it’s a matter of time. Pipe insulation cuts the rate of heat loss, sealing air leaks removes the wind that carries it away, and open cabinet doors let the house’s own heat in. A dripping faucet keeps water moving, which is harder to freeze and relieves pressure between the ice and the tap if a plug does form. None of these stops a deep freeze alone. They work together, and that’s why a house with all of them can survive a night that splits its neighbor’s pipes.
Mistakes to Avoid
- Insulating a pipe that’s already frozen. Insulation slows heat loss. It does not thaw ice. Warm the pipe first, then insulate it. See how to thaw frozen pipes.
- Turning the heat off in an empty house. The air in the walls drops fast. Keep it at 55°F or higher, and shut off the main water if you’ll be gone for a long cold stretch.
- Using an old incandescent light bulb as pipe heat. A bulb in a crawl space is a fire risk, and a heat cable with a thermostat is designed for the job.
- Leaving the garden hose connected. The hose traps water in the spigot, which freezes and splits the pipe in the wall. Pull every hose and cover the faucet, as covered in winterizing outdoor faucets.
Before the next cold front, it’s also worth confirming the furnace starts. A furnace that won’t turn on is the other way pipes freeze indoors.
FAQ
At what temperature do pipes freeze?
Water freezes at 32°F, but pipes inside a house usually survive until outdoor temperatures stay in the teens or low 20s for several hours. Pipes in exterior walls, unheated garages, crawl spaces, and attics are at risk first. Wind and a drafty wall make a pipe freeze at warmer outdoor temperatures than a sheltered one.
Should I leave faucets dripping to keep pipes from freezing?
On the coldest nights, yes, for the faucets served by pipes along exterior walls. Moving water is harder to freeze, and a drip also relieves pressure if ice does form. A steady drip about as thin as a pencil lead is enough. Open both hot and cold on a two-handle faucet.
Does opening cabinet doors really help?
Yes. Pipes under sinks on exterior walls are cut off from the room's warm air by the cabinet. Opening the doors lets heated air reach them. If you have small children or pets, move cleaning products out of reach first.
What temperature should I set the thermostat to keep pipes from freezing when I'm away?
Keep it at 55°F or higher. Turning the heat off or letting the house drop into the 40s is how pipes freeze in vacation homes. Ask a neighbor to check the house during a long cold snap, and know where your main water shutoff is.
Related fixes
Outdoors & Seasonal
Seal Drafty Windows Before the First Cold Snap
Find the leak with a smoking incense stick, then match the fix to the gap. And never caulk the weep holes at the bottom of a vinyl window frame.
Time30 min–2 hrs Cost$10–$45 easy
Outdoors & Seasonal
How to Winterize Outdoor Faucets Before the First Freeze
Pull the hose, close the indoor shutoff, drain the spigot, and cover it. 15 minutes per faucet in October prevents a burst pipe in the wall in January.
Time15 min per faucet Cost$0–$15 easy
Outdoors & Seasonal
How to Thaw Frozen Pipes Safely Before They Burst
No water from a faucet on a freezing day means a frozen pipe. Open the tap, warm the pipe with a hair dryer from the faucet end, and never use a flame.
Time30–90 min Cost$0–$30 easy