Outdoor Faucet Leaking? Where It Drips Tells You Why
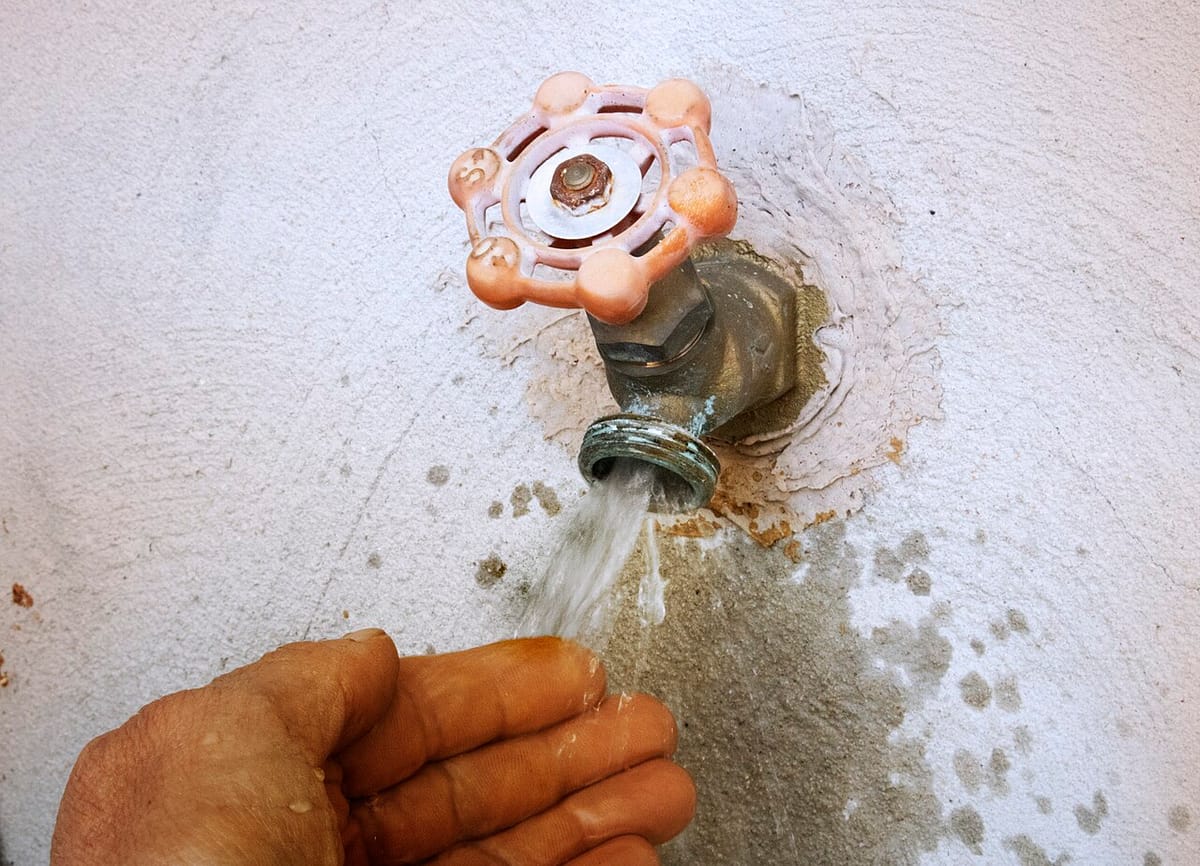
Cover photo by Fred Winograd via Wikimedia Commons, CC0, resized.
If this fix touches water, gas, or power, the guide starts with the shutoff step and says when a licensed pro should take over.
Product links in this guide are affiliate links. If you buy through one, we may earn a small commission at no extra cost to you. It never changes which products we recommend.
An outdoor spigot that drips seems like the most ignorable problem a house can have. It isn’t quite: a steady drip through a summer runs into real money on a metered water bill, and in a cold climate the same worn part is what lets a freeze split the pipe. The useful thing is that where the water comes out tells you exactly which part failed, and they’re different repairs.
Quick Answer
With an outdoor faucet leaking, watch where the water actually escapes. Dripping from the spout with the handle closed means the stem washer at the tip of the valve has worn out, and replacing it costs about $3. Water weeping around the handle while the faucet is running means the packing nut is loose or its packing washer is flat, and an eighth of a turn with a wrench often ends it. Water from a cap on top only when a hose is attached is the vacuum breaker, an $8 to $12 part. Shut off the water at the shutoff valve feeding the outdoor line before any of it, and budget 20 to 45 minutes.
What You’ll Need
- An adjustable wrench and a flathead screwdriver
- A faucet washer assortment kit, about $8, which covers nearly every hose bib size
- PTFE tape, $2, for any threaded joint you take apart
- A hose bibb vacuum breaker repair kit, $8–$12, only if the leak is from the top cap
- A small bucket and a rag
Step-by-Step
Shut the water off and open the faucet
Find the shutoff for the outdoor line, usually a valve on the interior side of the same wall, in a basement, crawlspace, or utility closet. Close it, then open the outdoor faucet fully and let it drain until nothing comes out. If you can’t find a dedicated shutoff, use the main. Working on a spigot with the water still on turns a twenty-minute job into a wet afternoon and a stripped part.
Read the leak before you touch anything
Turn the water back on for a moment and watch, then shut it off again. Dripping from the spout with the handle closed is the stem washer. Weeping around the base of the handle while the water runs is the packing. Water from the small cap on top with a hose attached is the vacuum breaker. Water that only appears when the faucet is open, coming from inside the wall or showing up on a basement joist, is a split pipe from a past freeze and the point where a licensed plumber takes over.
Try the packing nut first for a handle leak
The large hex nut directly behind the handle is the packing nut. With the faucet open, snug it clockwise about an eighth of a turn with the wrench and watch. Often the weep just stops. Do not crank it: overtightening makes the handle stiff and crushes the packing you’re trying to preserve. If a slight snug doesn’t do it, the packing washer inside needs replacing, which you reach in the next step anyway.
Pull the stem and replace the washer
With the water off, back the packing nut all the way out and withdraw the whole stem assembly, turning the handle as if opening it to help it thread out. At the far tip you’ll find a flat rubber washer held by a single brass screw. Old ones come out grooved, hardened, or flattened to half their thickness. Match the new washer from the assortment kit by diameter, seat it flat, and snug the brass screw without deforming the rubber. While the stem is out, replace the packing washer or O-ring around the shaft too, since you’re already there and it costs pennies.
Check the seat before reassembly
Shine a light into the faucet body at the brass ring the washer presses against. Run a fingertip around it. Smooth means you’re done. Pitted, scored, or rough means the new washer will chew itself up within a season, and the fix is either dressing the seat with a seat wrench and reamer or replacing the whole spigot, which is often the more honest answer on an old hose bib.
Reassemble, restore water, and test both states
Thread the stem back in, snug the packing nut firmly but not hard, and wrap any threaded joint you disturbed with PTFE tape wound in the direction the fitting tightens.
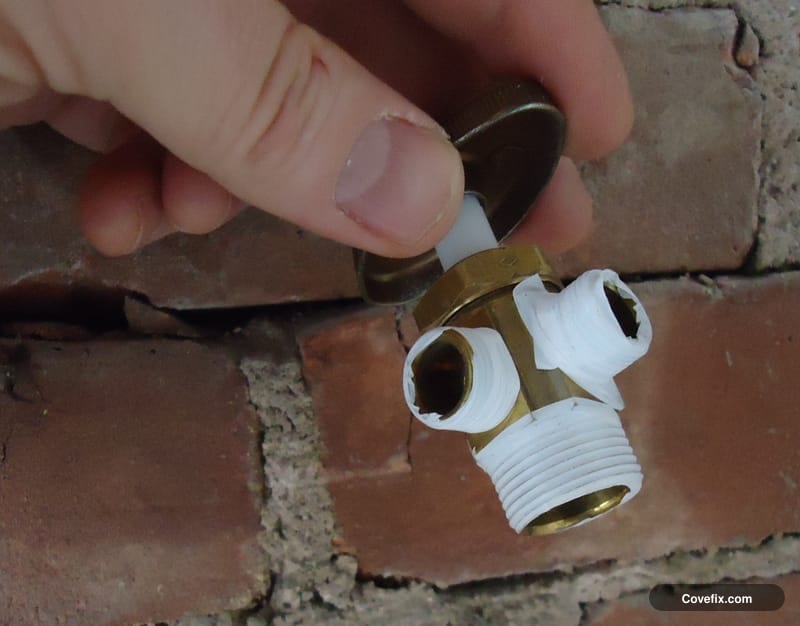 Tape wound the same way the fitting turns, so tightening pulls it into the threads instead of unwinding it. Turn the water back on slowly. Test closed for a spout drip, test open for a handle weep, then attach a hose and test again, because the vacuum breaker only reveals itself under pressure.
Time and Cost
| Fix | Time | Cost |
|---|---|---|
| Tighten the packing nut | 5 min | $0 |
| Replace the stem washer | 20–30 min | $3–$8 |
| Rebuild the vacuum breaker | 15 min | $8–$12 |
| Replace the whole hose bib | 1–2 hrs | $20–$40 |
| Plumber for a split frost-proof stem | 2–4 hrs | $250–$600 |
Why This Works
A hose bib is a compression valve, which means it stops water by screwing a soft rubber washer down onto a brass seat until the two surfaces meet with no gap. Rubber under constant pressure takes a permanent set, and once the washer flattens or grooves it can no longer make a full seal no matter how hard you crank the handle. That’s why tightening a dripping spigot harder never works for long, and why the fix is always the washer rather than more force. The packing is a separate seal doing a different job, keeping water from following the stem out to the open air while the valve is open, which is precisely why a packing leak only appears when the faucet is running.
Mistakes to Avoid
- Cranking the handle harder to stop a drip. It compresses the failing washer further and gouges the brass seat, turning a $3 repair into a whole new faucet.
- Working with the water still on. The stem is what holds pressure back. Pull it with the supply live and you get a fire hose.
- Reusing a hardened washer because it “looks fine.” A washer that has taken a set looks perfectly round and seals nothing. If you have it apart, replace it.
- Leaving a hose attached over winter. On a frost-proof faucet the attached hose traps water in the stem past the frost line, and that is the single most common cause of a burst pipe inside a wall.
The same worn-washer logic applies indoors, where the diagnosis just starts with identifying the cartridge type instead. That’s covered in fixing a leaky faucet. If pressure at this spigot has been weak for a while as well as drippy, the cause may be further upstream than the valve, which is the ground low water pressure covers.
Before the first hard freeze, the same spigot needs the hose off and the line drained, or the drip you just fixed becomes a split pipe inside the wall. Winterizing outdoor faucets takes 15 minutes each.
FAQ
Why does my outdoor faucet leak from the handle when the water is on?
The packing nut behind the handle has loosened or its packing washer has worn flat. Water escapes around the stem instead of staying in the valve body. Try snugging the packing nut about an eighth of a turn with a wrench first, with the faucet open, because that alone stops it a good share of the time.
How do I stop an outdoor faucet from dripping when it's closed?
Replace the stem washer. Shut off the water to the outdoor line, unscrew the packing nut, pull the stem out, and swap the flat rubber washer held by a brass screw at the tip. A washer assortment costs about $8 and takes twenty minutes to fit.
Why does my spigot leak from the top only when a hose is attached?
That's the vacuum breaker, the small cap on top of a frost-proof faucet that stops garden water from siphoning back into your drinking supply. Its internal seal wears out, and it usually only shows itself under the back-pressure of an attached hose. A repair kit runs $8 to $12 and screws on in minutes.
Can a frozen outdoor faucet cause a leak inside the wall?
Yes, and it's the one failure here that needs a plumber. A frost-proof faucet left with a hose attached over winter traps water in the long stem, which freezes and splits the pipe inside the wall. The giveaway is water appearing only while the faucet is open, often with a stain on a ceiling or basement joist rather than at the spigot itself.
Related fixes
Kitchen
How to Fix a Leaky Faucet (Find the Right Part First)
A dripping faucet is a worn cartridge, washer, or seal. How to identify your faucet type, buy the right $5–$20 part, and swap it in under an hour.
Time30–60 min Cost$5–$20 moderate
Bathroom
Low Shower Water Pressure? Fix It in One Evening
Weak shower pressure is usually a mineral-clogged head, not your pipes. Soak it in vinegar, check the inlet screen, and know when it's something bigger.
Time20 min active + 1–2 hr soak Cost$2–$25 moderate

Outdoors & Seasonal
How to Winterize Outdoor Faucets Before the First Freeze
Pull the hose, close the indoor shutoff, drain the spigot, and cover it. 15 minutes per faucet in October prevents a burst pipe in the wall in January.
Time15 min per faucet Cost$0–$15 easy